
I wrote this article about photographer WordPress security with WordPress users in mind, but it has lots of tips and information that anyone will find helpful!
If you have used all the default settings on your WordPress site, it is extremely easy for hackers to hijack your website. This will cost you time, money, and headaches to fix. This will also tank your Google Search rankings (at least temporarily).
The steps in this free guide are a good starting point to become more familiar with the inner workings of your site and to help secure it… for no cost!
If you’re a new photographer looking to start your professional website, I recommend WordPress.org. This is because you have the best chance to rank on Google searches with it.
Because of the ubiquity of WordPress (34% of all websites use it), it does make you a target for hacking. There are some basic steps you can take to make your site much harder to hack though! These are some of the things I wish I had known about when I started, they would have saved me hundreds of dollars!
To use most of the tools below, you have to be able to login to your web host (like BlueHost, GoDaddy, or SiteGround), and access some key files in your CPanel (core website files). If this sounds scary, tech support at your host company can probably walk you through some of these steps or do them for you at your request!
*the tips below are Bonnie Photo’s recommendation to photographers looking to secure their websites, Bonnie Photo offers no guarantees regarding site safety or integrity, use your best judgement.
1. DO NOT USE THE DEFAULT LOGIN “ADMIN”
This is the number one thing that makes your website hackable! The number one alert I get from my security plugin is that someone has tried to login with an invalid username (admin).
You need to change the login to your WordPress site to something that is difficult for a hacker to guess, so not admin or your name! For instructions on how to change this click here.
2. Use A Password Manager
Using a password manager like LastPass will make your life 1000x easier. Stop using a handful of the same passwords for everything! A password manager will help you generate and store random, very secure passwords.
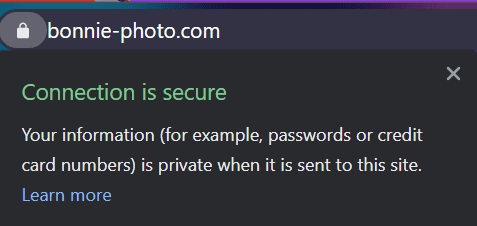
3. Make sure your website has an active SSL certificate
Most web hosts offer this for free, but make sure it is active! If not, visitors to your site may see a warning about your website being unsafe to visit!
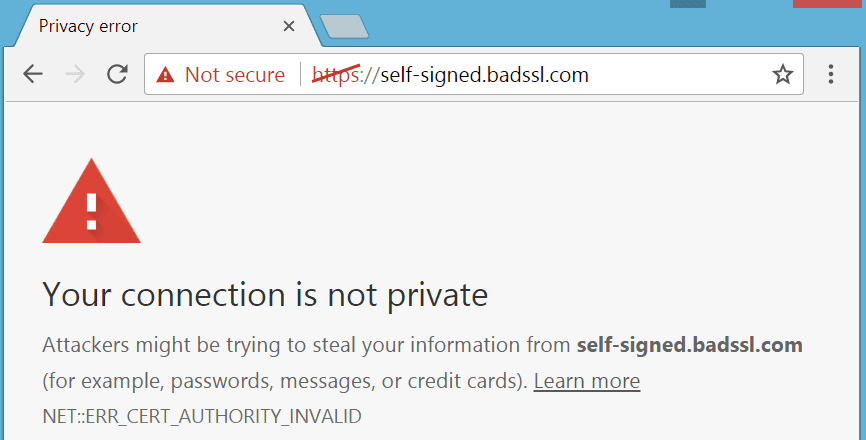
A secure site will have a little lock symbol in the URL bar of your browser. Make sure you ask a couple friends to go to your website and let you know if they see the lock symbol.
4. Install Login LockDown
This plugin will make it nearly impossible for hackers to use brute force to login to your site by guessing many random passwords.
5. Install at least one of the following security plugins (I have all three!)
All three of these plugins are supposed to be doing the same thing, but they each don’t catch everything. My suggestion: install all three!
This is the security plugin that I have chosen to pay for the premium version of.
6. Change your website database prefix
This makes is harder for hackers to guess the file structure of your website and force their way in. Click here for more.
7. Install the 7G Firewall on your site
This free, open-source tool works at the root of your site to block malicious IP addresses.
To install the 7G Firewall, you need access to the files on your server, and the ability to edit your .htaccess file. Most hosts will let you easily do this through their CPanel.
8. Prevent Email Spoofing
This tip is for everyone, not just WordPress users.
It is super easy for hackers to spoof your email address and potentially scam your clients. It is also probably a constant worry of yours that your emails are going straight into the spam folder. To help prevent this follow the three steps listed on this page by Google: add an SPF record to your domain, turn on DKIN signing for email, and enable DMARC.
You’ll need to add TXT records to your DNS for all three of these steps, and you have to do them in the order listed above.
For the fist step, you need to add to the SPF record for each service sending mail on your behalf, for me this includes Tave, Shootproof, and MailChimp. Each has their own instructions for how to add them to your record (some have instructions for both SPF and DKIM, some just for SPF).
If you are only going to implement one of these features, start with SPF!
More resources
This article is a more comprehensive list of simple steps you can take to prevent your precious photography website from being hacked.
Meanwhile, this is more difficult, but contains very good list of steps to take.
Save yourself hundreds of dollars down the road by spending a few hours to read up and take these steps now!
Question about the advice in this article? Don’t hesitate to connect with Bonnie for more specific advice!